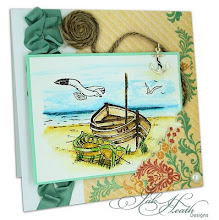
I played along with last weeks Top Tip Tuesday and was going to do a quick 'how to' on my card but got waylaid into doing something else. Maybe I'll save that idea to show another time. Meanwhile here's another tip, which I've had in draft for a little while. It may be useful, it might not be! Most Craft Magazines have free papers and many of them are downloadable from their forums or home pages for you to save on your computer. I don't find the papers themselves 'usable' straight from the magazine and often there's a different pattern on the ot her side. (Not always) Once I've saved them to my computer in their own document, I forget what I have, so I save the papers from the magazines in clear plastic pockets inside large folders. This way I can go through them, matching things and because I've written on the clear plastic folder what they are, I know just where I can find them on my computer (I have a couple of add on hard drives) and can print them
  out as many times as I like...or until the ink runs out! Then any of the leftover bits can go into these clear pockets to be used up another time.
 her side. (Not always) Once I've saved them to my computer in their own document, I forget what I have, so I save the papers from the magazines in clear plastic pockets inside large folders. This way I can go through them, matching things and because I've written on the clear plastic folder what they are, I know just where I can find them on my computer (I have a couple of add on hard drives) and can print them
  out as many times as I like...or until the ink runs out! Then any of the leftover bits can go into these clear pockets to be used up another time.