1. Making a Shaker Without a die

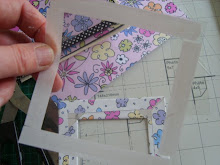
Fold your chosen backing paper around your frame and cut off the corners.
2

Glue down making sure the paper is nice and 'tight'.
3

Smooth out the edges and corners and
4
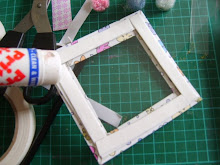
Fix Double Sided tape to the acetate, rather
5
Fix the acetate to the back of frame using Double Sided tape.
6

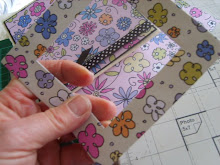
Choose paper that will match well with the frame and your
7
Cut out the chosen paper and attach to your card. Make sure there's no sticky bits or your beads will stick to it later. You can add wording or a Stickeroo too! (I'm using Pink Petticoat papers)
8

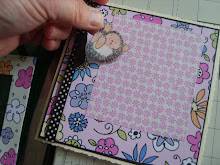
Fix 3D foam to the back of the frame (over the acetate) make sure there's no gaps, otherwise you'll lose all your beads!
9

Add some beads or glitter. If it's a beach card you
10
I add a little bit of glue stick over the 3D foam, to stop it
11

Press your frame down firmly over your beads.
12

And there you have it...
13
The Shaker Card
14

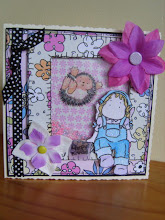
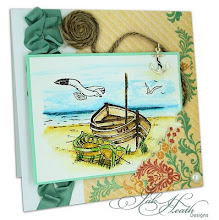
More Shaker Cards
 Tiny pink beads were used here.


You are right .. very cute. Clear instructions .. Thank you.
ReplyDeletelovely clear instructions will give it a go thank you margie
ReplyDeleteBest instructions ever.
ReplyDeleteThankyou sooo much for sharing. Lynne from OZ