
I do love paper piecing. It's very easy to do, and it has such a lovely effect. It also saves you having to colour in, although all these images here have had a little extra colour added to their 'spots' with Promarkers.
Gelly The Giraffe can be found in my Didi Digi Store, Dragonsmoore,(Spyder's Other Corner!) Although his 'spots' and front are a little different! Let me know if you'd prefer this one to the one seen in the store. He's priced at .99p
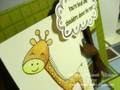
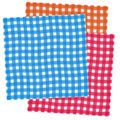
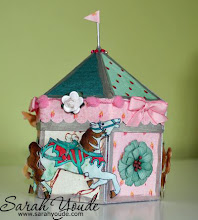
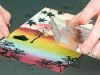
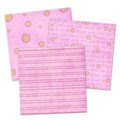
I also did a bit of decoupage (although it's more like 3D) to the left hand Giraffe on the front of this card, then just fixed the other straight over the bottom image. I printed Gelly (or Gerry as this one is called!) onto some pastel yellow and green gingham papers. As you can see I flipped the image to face the other way. This can easily be done in 'Word' if you haven't got a programme that does that. Jak Heath shows you how to flip and resize your digi's on her YouTube video here

I coloured in his 'spots' with a yellow Promarker. You don't really have to colour the bottom image, as you won't really see it, but, the good part is, you can cut off fiddly bits from the top image, like skinny tails and those bobbly bits giraffes have! On this particular one, I only cut off the tail, allowing the tail from the bottom image to be seen. Touch up the edges of the cut out image with a little bit of black pen, this will hide any cutting snags.

To make the 3D effect, I decided to put a cut out yellow Gelly over the Gelly on the green gingham paper.
If you 'curl' the image with scissor handles, or a large embossing tool, or place it face down in the palm of your hand and just circle your finger round and round on the back of the image, it will curl a little, and once fixed into place, will be slightly raised off the card. I usually like using silicone glue for this, as you can easily keep the centre of the image a little higher than the edges, but 3D foam pads are okay too. On this card, I could have cut off Gelly's back legs too, if of course, both top and bottom images were the same colours, then even added more layers to make it more of a decoupage effect.(another face maybe?) I might try that next time!

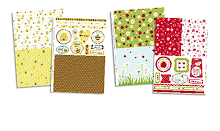
You can find a free download of these are other coloured gingham papers
**oops sorry, no longer freebies but a paid yearly membership!
and HERE too!
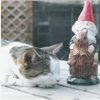
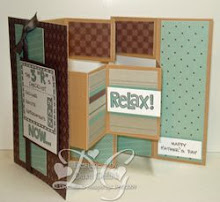
Here's the finished card. Easy peasy!

Thank you for stopping by.


hi, new to the site, thanks.
ReplyDeleteThank you, drop by again and say hello!
ReplyDeleteVery cute! Thanks for sharing!
ReplyDeleteThis is so cute, ideal 'new baby' card...thanks for sharing...xx
ReplyDeleteHi Lyn
ReplyDeleteI do love this giraffe! I'm confused about the rubbing and making it curl bit; don't the sticky pads lift it off the page anyway and surely making it curl will only make the concave bit stick out, the other parts will bend more towards the paper? Sorry if I'm being dim
Mo :0)
I don't usually 'curl it' when I used 3D foam pads, but I always do when I use silicone/gel glue, big dollop in the middle and just smaller smudges at the sides,just makes it pop a bit more. Here I think I used 3D foam pads.
ReplyDelete